Cue Wizard

Cue Wizard helps you search and modify specific cues in Figure 53’s QLab, either by searching for text, by cue type (Audio, Video, Fades, MSC, etc) or by other parameters (flagged, broken, cues with specific Colour label, routes to a specific output).
Once you’ve found these cues, you can either:
* View them one at a time, starting with your current position in the cue list, with a Show Previous / Next interface, allowing you to view, or manually edit the search results.
* Modify the cues, either one by one (you’re shown each cue, and how it will be modified, with the option to change it or ignore it); or to go ahead and modify all the search results.
You can modify the cues by changing their label colour, whether they’re flagged, or by changing the text in the cue name, number or notes fields, using a range of text operations such as Find & Replace, Add text, Remove text, Add a number sequence, etc.
Cue Wizard can also log its searches and modifications to a text file (which is formatted to easily load into Excel too).
For example, you could
Search for all MSC cues, you could then modify those MSC cues by doing a Find & Replace on the words “MSC go” in the cue name, and replacing it with “Lighting Cue Go”. They could also be labelled with a Green colour.
Search for all cues that route to audio output 9, and modify them by colouring them red, and adding “TV SPEAKER: “ to the start of the cue name
You could also Search for all MSC cues, and create a log of those search results, whilst opting not to modify anything.
Once you’ve setup your search and modify parameters, you can save them as a preset, so you can load and run that preset quickly in the future. There are a bunch of useful presets pre-loaded into the program, such as Find all cues with cue numbers, and add “SQ “ before the cue number.
There are also a range of options to choose which cues you might modify or leave alone, set to some sensible options. For example, when renaming cues, you might want to rename Audio cues, but ignore Fade cues, because QLab dynamically alters the name of a Fade cue when you change the name of its target audio cue.
This app is only possible because of all the lovely AppleScript hooks that Figure53 have put into QLab, which they kindly helped me understand a few of, and also through the work of Rich Walsh and Mic Pool, whose methods I’ve drawn upon. It is compatible with QLab v4.3.4 onwards (it uses the new Cuelist Parent hook introduced in that).
V1.09 and v1.10 have been released simultaneously, where both versions contain updates to the previous version v1.08, and where v1.09 is for QLab v4 users, and v1.10 is for QLab v5 users.
Cue Wizard is free to everyone. As such, no guarantees are made about its performance, and no liability is accepted for loss of work. The app can modify hundreds of cues very quickly so always save your workspaces before running it.
If you have any issues with it, or feature tweaks or requests, or want to share a handy preset, please email me directly at garethfry@hotmail.com.
Cue Wizard is a development of an app called Text Wizard I wrote for QLab v2 back in 2011.
To download Cue Wizard, please enter your details to receive subsequent software update announcements.
Nov 2024 - v1.09 (for QLab v4) and v1.10 (for QLab v5)
Clearer dialog boxes, hopefully more intuitive to use!
Search:
Added: Can now search for cues that route to one file target, or to all files with the same file name
Revised: Searching for cues that route to a specific audio output will now detect Fade cues as well as Audio, Mic, and Video cues
Added: Search for the 'loudest' cues to an output based on the volume of the output fader, the master fader or a combination of both. The results will be displayed sorted by loudest first. Very helpful if need to adjust gain structure. Here, loudest means the volume faders are higher. The contents of the sound file affect the actual volume, but this is not calculated.
v1.10 only: Changed: QLab 5 Network cues are now specified as OSC, UDP, etc in Workspace Settings > Network rather than in individual cues. There is no way for CueWizard to establish whether an individual cue is an OSC type cue, or otherwise; so you can’t search for only OSC cues now, however…
v1.10 only: Added: Search for Audio, MIDI, or Network patches by Name (or Number). This searches for cues routed to particular outputs, for example to a particular sound card, or a MIDI interface, or most usefully a Network patch, for example, Rivage Mixer, or General OSC output. You can name each Network Patch in Workspace Settings > Network > Network Outputs in the far left column.
v1.10 only: Added: Search for Video cues that route to Video Output Stage Name (or number). If you have one stage for a full stage projection, and another for a prop TV, you could search for all cues that route to the Stage named ‘TV’.
v1.10 only: Added: Search for Video cues that have different clock types
v1.10 only: Added: Search for cues that have a start action such as 'fade and stop others' or 'duck other cues’
v1.10 only: Added: Search for cues that have a second trigger action
v1.10 only: Added: Search for cues that are triggered by a specific hour of the Timecode clock, for example search for all cues that are triggered by a timecode in the hour 2.
Modify:
Added: Cues can now be modified to be unflagged
Added: Can now reset, copy and move specific audio outputs, for example, “zero” output 7, or copy volume, gang and crosspoint settings from output 48 to output 7.
Added: Can now adjust master output level, or specific audio outputs by X dB
Added: Additional option to prepend or append the LTC trigger time of a cue to it’s Cue Name, Number or Notes. There is also an option to scan through and update that text if the LTC trigger time has been changed.
Known issues:
QLab does not have a mechanism to allow Cue Wizard to find out if a fade cue is active (yellow faders and crosspoint) or inactive (greyed out). If audio levels of fade cues are modified, you are encouraged to manually check these cues.
The one thing everyone asks is that “Search for cues that route to audio output” could display the audio output names as well as the audio output number, but QLab does not have a mechanism to extract this information via AppleScript.
AppleScript cannot handle “styled” or rich text. Any modifications of Cue Notes will revert any text there into plain text format.
October 2020 - v1.08 released.
Additional Search routines:
Search by MIDI Destination (i.e. which MIDI interface port a MIDI cue is routing to)
Search for cues that target the same file (for example, to identify which cues use the same file)
Search for cues that target files with the same file name (for example, you may be playing the same file but from two different places on your hard drive)
Search by Audio output (eg, which cues route to output 11) now identifies Fade cues as well as Audio, Mic and Video cues
Cues can now be modified to be Unflagged (previously you could only set it to be Flagged, or left as it was)
Updated dependant library and other bits of code for Catalina compatibility
Clearer user interface for first dialogue box to make it more intuitive.
How to use Cue Wizard
I’ve tried to include instructions on Cue Wizard’s windows to allow you to operate it without reading this guide. But you may find the below useful if you’re getting unexpected results.
Open a workspace in QLab
If you are using Cue Wizard for the first time you might like to try opening the supplied workspace ‘Cue Wizard sandbox’ to experiment with.
Whenever you run Cue Wizard, save your QLab workspace first!

Run Cue Wizard
The first time you run Cue Wizard, depending on your version of Mac OS X, you’ll get a bunch of alert boxes saying that Cue Wizard is trying to control “System Events” (click OK), that it would like to control this computer using accessibility features (Click Open System Preferences, Click the padlock in the bottom left corner of the Accessibility system preference, enter your username and password, then click the tick box next to Cue Wizard. Now head back over to Cue Wizard to tick one last box! You’ll only have to do this the first time you run the program on your computer.
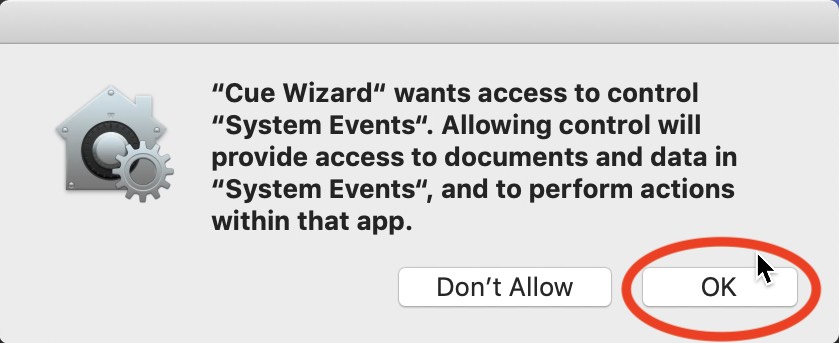
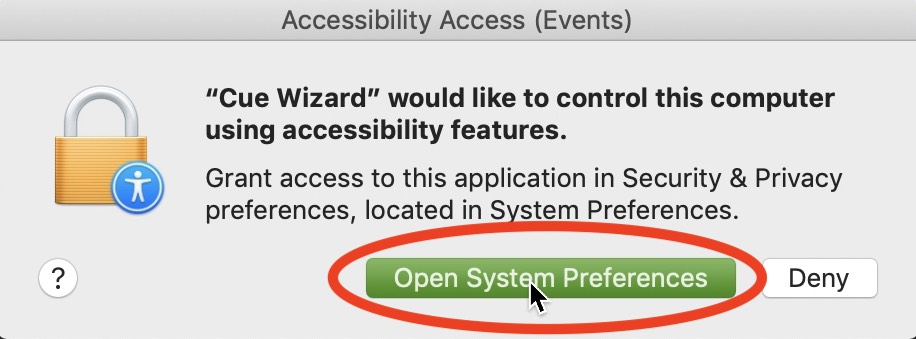
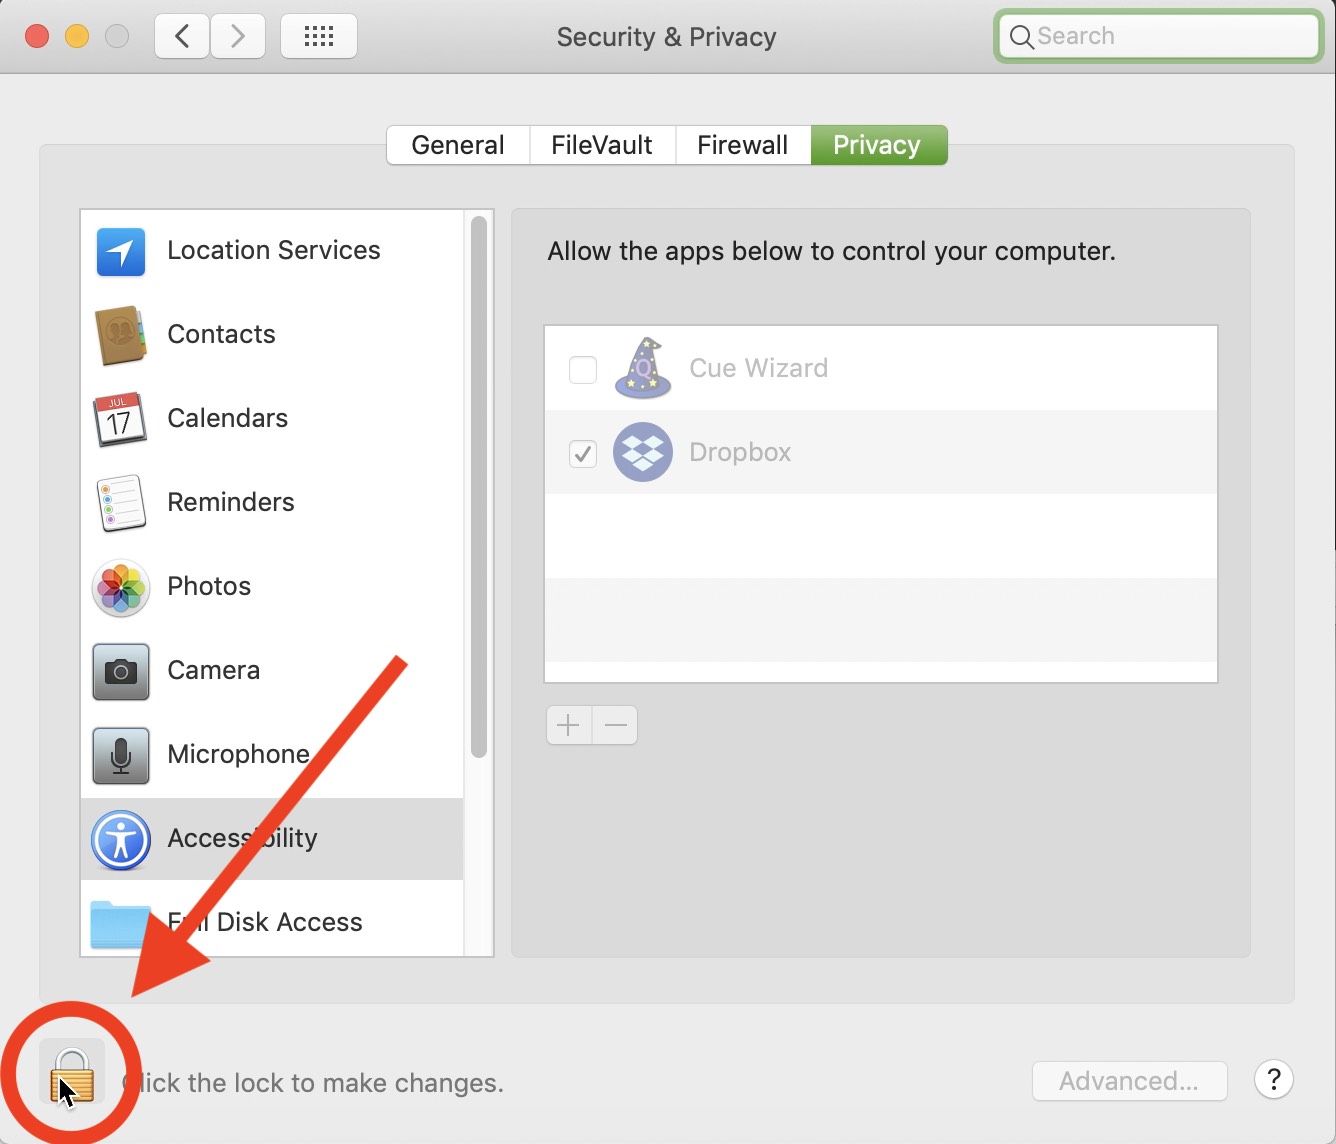
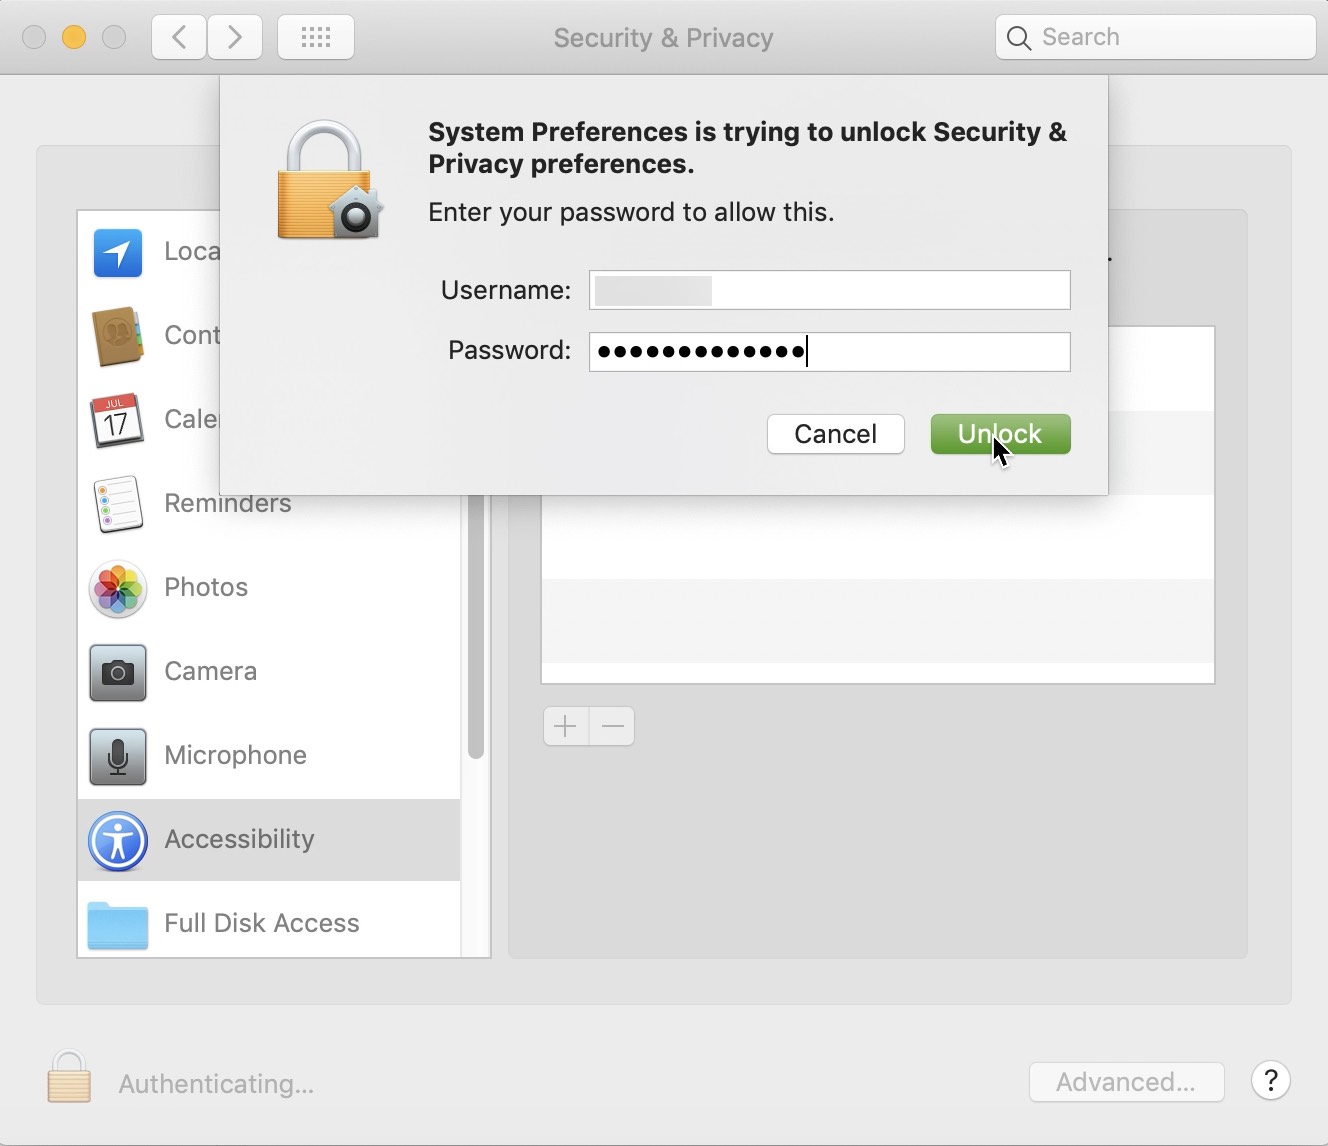
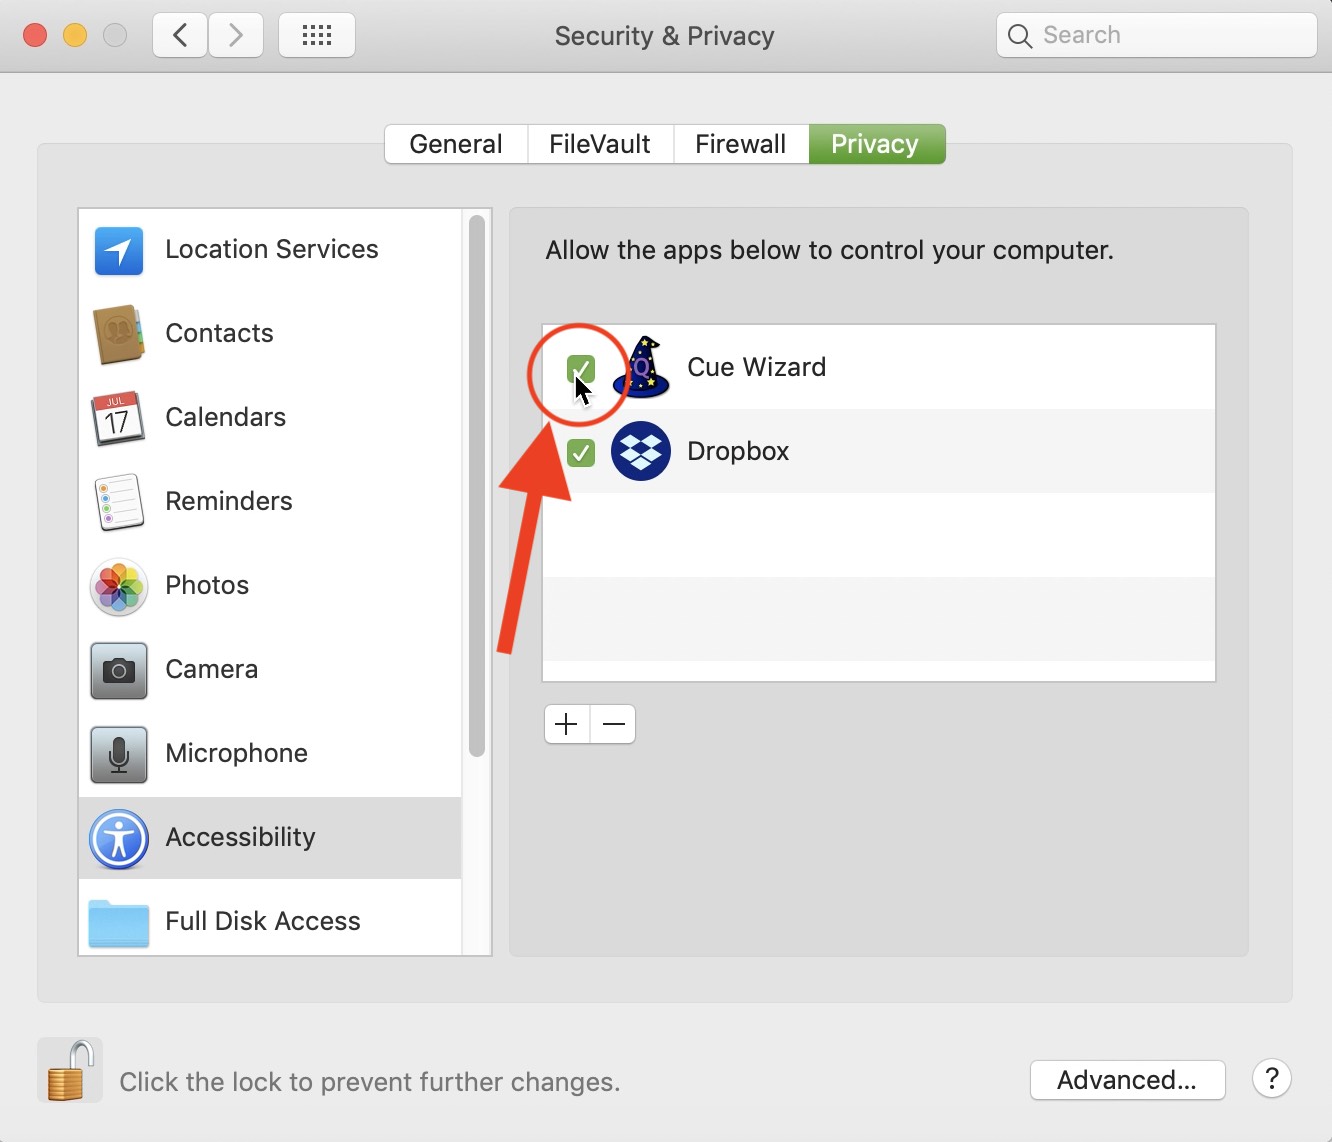

Because apparently you can’t have too many security tick boxes…

The Search window
In the top section of the first Cue Wizard window, you are asked which cues you’d like to search for.
In the ‘Search for:’ dropdown box, there’re a large range of options to choose from. You can choose from only operating on certain cues (such as all MSC cues); or you can choose to search for text in the cue name, number, or notes; or you could search for all cues that route to a certain audio output. Or you can choose every cue, which can be useful when you want to specify your changes in the Modifications window.
.
You can choose what you’d like to do with those search results:
View the search results one at a time (you can then manually edit them, or skip to next search result)
Modify the matching cues, one at a time
Modify all the matching cues
We’ll look at the impact of those options in a moment
Cue Wizard has the option to save and load Presets for all its settings. You can choose a built-in Preset (and then click the ‘Run Preset’ button); or you can select the ‘Load & Run Preset’ from the drop down menu to open up one of your saved Presets. (Presets can be saved in the next Modifications window)
Finally, at the bottom of the first window is the option to create a Log file. This creates a text file on your desktop called ‘Cue Wizard log’, with the date and time you started Cue Wizard appended to the end. This log file is a great way to create reports about cues in your show. For example by doing a Search for all MSC cues, then hitting quit when you get to the modifications page, you can generate a text file of all your MSC cues in your show. The log file has been formatted so you can drag it into Excel and see the information more neatly. The log file is very useful if you are getting unexpected results rom running Cue Wizard, as it also logs your search and modification parameters as well as the search results (with some background information on how they are referred to within QLab) and which cues it changes, and how.
When you click ‘Search for…’, Cue Wizard may ask you a couple of questions, such as what text you want to search for, as relevant to your search criteria. It’ll then search through your cuelist. You’ll see a pop-up window with a progress bar if you have a large QLab workspace. The log file will be populated with the search results.
View, One By One
If you chose ‘view one by one’ above, a persistent dialog box will pop up allowing you to infinitely scroll backwards and forwards between the cues that match your search criteria. IF possible, Cue Wizard will show you the nearest match to your search criteria based on your current selection in the workspace. If it can’t determine that, it’ll start from the to pop the cue list.
No cues will be modified at all when you choose this option. But you are free to edit them in QLab and come back to Cue Wizard when you’re ready to edit the next search result. For example, you might want to Search for all audio cues that route to audio output 7. You could then Copy (Command-C) your first search result in QLab, then use Cue Wizard to move around all other cues routing to output 7 and do Paste Cue Properties (Command-Shift-V) to paste the settings of your first search result to the others.
Try pressing Control-F7 on your keyboard (or System Preferences > Keyboard > Shortcuts, then click ‘All controls’ below Full Keyboard Access. This enables you to use Tab, and Shift Tab to move around the Previous and Next buttons more swiftly.
Modifications window
If you chose either the ‘View each cue… choose to modify it (or not), one at a time’ or ‘modify all…’ options, Cue Wizard’s Modifications window will appear next. This allows you to select how Cue Wizard will modify the cues that meet your initial search criteria.
The options in this dialog box can be a bit confusing, as there are many possibilities. You might want to open the supplied QLab workspace ‘Cue Wizard modifications sandbox’, Do a Search for.. ‘All Cues in all workspaces & cue carts’ and choose ‘Modify one by one’, then experiment with how the options in the Modifications window affect the cues in different ways.
The key things you can do with your search results are:
Flag them (which puts the Flag symbol in the far left column of matching cues in the QLab cue list.

Change the colour label to a specific colour. There are the standard five available colours, plus a few more. You can also chose to remove colour labels by selecting ‘none’.
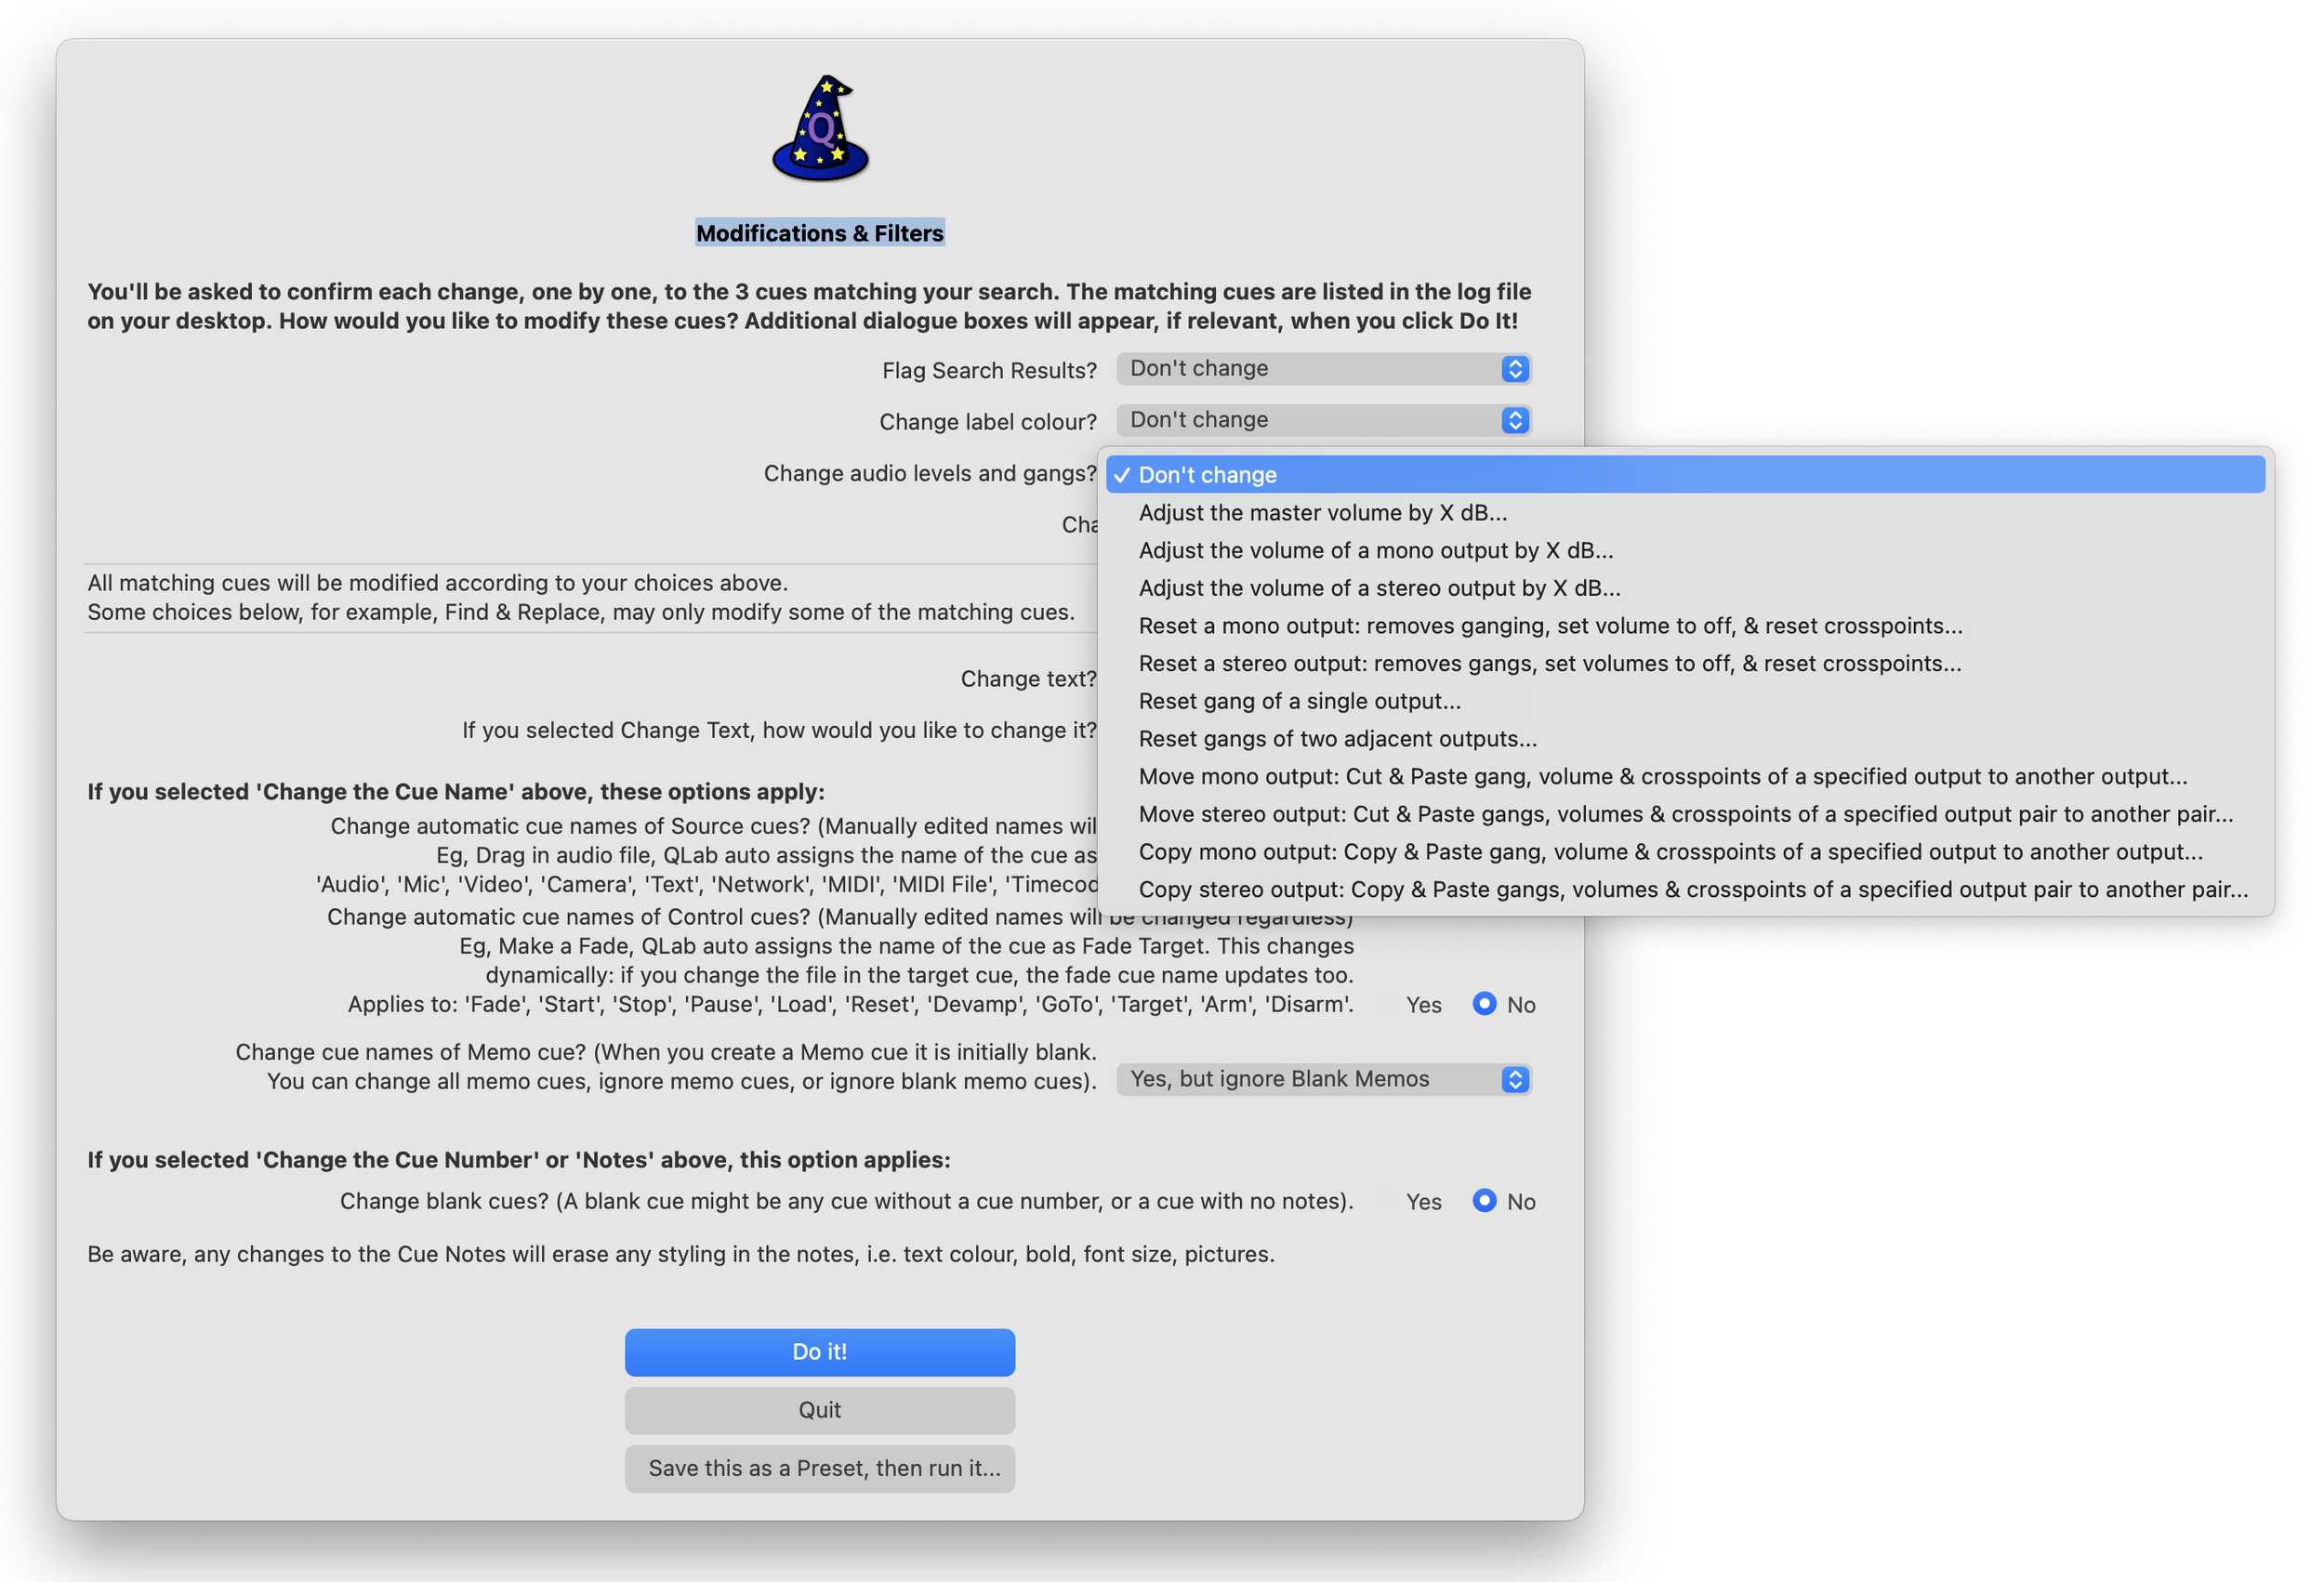
Change the audio levels and gangs. You can adjust the master level, or a specific output or pair of outputs, reset all the settings and/or gangs, or move or copy the gangs, volumes and crosspoint from one output to another, or to another pair.
Change the text of the cue name, number or notes. (Which is where our options get a bit more complex).
You can choose to do all, any, or none of these options. If you just click ‘Do It!’ with everything set to ‘Don’t change’, Cue Wizard will scan through the search results without making any changes.
Level manipulation
This is a new feature to v1.09 & v1.10. Whilst the usefulness of adjusting the volume of a cue is fairly apparent, why might you want to reset outputs, or move them around? Whilst some shows may have a relatively short lifespan and perhaps be unique to one theatre, others have longer lives and can end up playing in radically different auditoriums, or with radically different sound systems. Whilst we can often live with having outputs that aren’t quite in order, sometimes this can be a hindrance, particularly with shows that use 24+ outputs.
After you click “Do It!”, you will be asked for further information, such as which output you want to adjust, by how much and whether you want to include Fade cues or not (see below).
Adjust the volume
Adjust the master volume by X dB
After you click “Do it!” you will be asked how much you would like to adjust the volume by
You will be asked if you want to include Fade cues or not - see below.
You will be warned about minimum and maximum volume limits - see below.
Cue Wizard will than adjust the master volume of all cues that match your original search criteria.
Adjust the volume of a mono output by X dB
After you click “Do it!”, you will be asked which output you would like to adjust
You will be asked how much you would like to adjust the volume by
You will be asked if you want to include Fade cues or not - see below.
You will be warned about minimum and maximum volume limits - see below.
Cue Wizard will than adjust the output volume specified of all cues that match your original search criteria.
Adjust the volume of a stereo output by X dB
After you click “Do it!”, you will be asked which output you would like to adjust. You can then choose the left output of your stereo outputs, for example, you need only select output 7 to modify output 7 and 8.
You will be asked how much you would like to adjust the volume by
You will be asked if you want to include Fade cues or not - see below.
You will be warned about minimum and maximum volume limits - see below.
Cue Wizard will than adjust the output volumes specified of all cues that match your original search criteria.
Reset an output
If you are no longer using a particular output, for example you have moved to a new venue that doesn’t have an equivalent speaker system, you may wish to clean things up a bit and remove anything that routes to that now defunct output. Or perhaps you need to use that output for something else, but want to “zero it”, to reset it, before you start programming its new purpose. To affect all cues in your workspace, you might select “Found All Cues in All Cue Lists & Carts” in the first Search window.
Reset a mono output: removes ganging, set volume to off, & reset crosspoints
After you click “Do it!”, you will be asked which output you would like to reset.
You will be asked if you want to include Fade cues or not, which you typically would for this operation.
Cue Wizard will than set the output volume to Off and remove any ganging for that output.
If the Audio or Video cue being changed has a mono file it will set the crosspoint to 0dB. If it is a stereo file it will set the two crosspoints to -6dB. If it is a multi-channel file, all crosspoints will be set to Off.
Reset a stereo output: removes gangs, set volumes to off, & reset crosspoints
After you click “Do it!”, you will be asked which output you would like to reset. You can then choose the left output of your stereo outputs, for example, you need only select output 7 to reset output 7 and 8.
You will be asked if you want to include Fade cues or not, which you typically would for this operation.
Cue Wizard will than set the output volumes to Off and remove any gangs for those outputs.
If the Audio or Video cue being changed has a mono file it will set the crosspoint to 0dB for both outputs. If it is a stereo file it will set the two crosspoints so that the Left channel of the stereo output routes to the Left output at 0dB, and the right channel to the Right output at 0dB. If it is a multi-channel file, all crosspoints will be set to Off.
If it is a Fade cue being reset, all crosspoints will be set to Off
Reset gang of a single output
After you click “Do it!”, you will be asked which output you would like to adjust.
You will be asked if you want to include Fade cues or not, which you typically would for this operation.
Cue Wizard will than remove the gang to the specific output of all cues that match your original search criteria.
Reset gangs of two adjacent outputs
After you click “Do it!”, you will be asked which output you would like to adjust. You can then choose the left output of your stereo outputs, for example, you need only select output 7 to modify output 7 and 8.
You will be asked if you want to include Fade cues or not, which you typically would for this operation.
Cue Wizard will than remove the gangs to the specific outputs of all cues that match your original search criteria.
Moving and Copying outputs
This is again useful if you have changed your speaker system set-up in some way, and now your QLab outputs aren’t in the order you would like. This can happen if you have to add some extra speakers mid-way through the technical rehearsal, or perhaps move to a new venue that has additional outputs you need to route to. Moving an output is the equivalent of cut and paste, where cut is the equivalent of reset as described above. Copying an output is the equivalent of copy and paste, where the original output routing is left untouched.
To affect all cues in your workspace, you might select “Found All Cues in All Cue Lists & Carts” in the first Search window.
Move mono output: Cut & Paste gang, volume & crosspoints of a specified output to another output
For example, you might move output 48 to output 7.
After you click “Do it!”, you will be asked which output you would like to move (for example, choose output 48 as the source output)
You will then be asked which output you would like to move it to (for example, choose output 7 as the destination output)
You will be asked if you want to include Fade cues or not, which you typically would for this operation.
Cue Wizard will than set the crosspoint, volume and gang of the destination output (for example, output 7) to be the same as the source (for example, output 48)
It will then reset the source output volume to Off and remove the gang.
If the Audio or Video cue being changed has a mono file it will set the source output crosspoint to 0dB. If it is a stereo file it will set the two crosspoints to -6dB. If it is a multi-channel file, all crosspoints will be set to Off.
Move stereo output: Cut & Paste gangs, volumes & crosspoints of a specified output pair to another pair
For example, you might move output 47 & 48 to output 7 & 8.
After you click “Do it!”, you can then choose the left output of the stereo outputs you wish to move (for example, you need only select output 47 to set output 47 and 48 as the source outputs
You will then be asked which outputs you would like to move it to (for example, choosing output 7 would select output 7 and 8 as the destination outputs)
You will be asked if you want to include Fade cues or not, which you typically would for this operation.
Cue Wizard will than set the crosspoint, volume and gang of the destination outputs (for example, output 7 and 8) to be the same as the source (for example, output 47 and 48)
It will then reset the source output volumes (outputs 47 & 48) to Off and remove any ganging on those outputs.
If the Audio or Video cue being changed has a mono file it will set the source output crosspoint to 0dB. If it is a stereo file it will set the two crosspoints to -6dB. If it is a multi-channel file, all crosspoints will be set to Off.
Copy mono output: Copy & Paste gang, volume & crosspoints of a specified output to another output
For example, you might copy output 48 to output 7.
After you click “Do it!”, you will be asked which output you would like to copy (for example, choose output 48 as the source output)
You will then be asked which output you would like to copy it to (for example, choose output 7 as the destination output)
You will be asked if you want to include Fade cues or not, which you typically would for this operation.
Cue Wizard will than set the crosspoint, volume and gang of the destination output (for example, output 7) to be the same as the source (for example, output 48)
The source output will be left unmodified (for example, output 48)
Copy stereo output: Copy & Paste gangs, volumes & crosspoints of a specified output pair to another pair
For example, you might copy output 47 & 48 to output 7 & 8.
After you click “Do it!”, you can then choose the left output of the stereo outputs you wish to copy (for example, you need only select output 47 to set output 47 and 48 as the source outputs
You will then be asked which outputs you would like to copy it to (for example, choosing output 7 would select output 7 and 8 as the destination outputs)
You will be asked if you want to include Fade cues or not, which you typically would for this operation.
Cue Wizard will than set the crosspoint, volume and gang of the destination outputs (for example, output 7 and 8) to be the same as the source (for example, output 47 and 48)
The source outputs will be left unmodified (for example, output 47 and 48)
Workspace Minimum and Maximums
The Volume Limits set in Workspace Settings > Audio apply to any changes Cue Wizard tries to set.
If you have the Minimum Volume Set to -60dB, and use Cue Wizard to set an output below that limit, it will snap to Off! For example, if yuse Cue Wizard to turn UP the master volume of a cue that is already at +10db by another 10dB, the maximum volume limit will apply and it will be set to +12dB instead of +20dB. You may wish to increase the Maximum Volume Limit to a higher amount to avoid this.
For example, if you have the Minimum Volume Limit set to -60dB, and use Cue Wizard to turn DOWN the master volume of a cue that is already at -55db by another 10dB, the minimum volume limit will apply and it will be set to -99dB instead of -65dB. You may wish to decrease the Minimum Volume Limit to a lower amount to avoid this.

Active vs passive fades
In the screenshot of a fade cue below, you can see that the volume faders of outputs 1 and 2 are “greyed out”, whereas the master fader, and outputs 3 & 4 are yellow. The greyed out faders won’t have an affect on the audio level of a cue, but the yellow ones will.
Likewise, the crosspoint are yellow for output 3 and 4 to indicate that this fade will have an active change on the crosspoint level, but the crosspoint for output 1 and 2 won’t.
A limitation of QLab in respect to AppleScripting is there is no way for Cue Wizard to determine if a fade cue is active or not - whether the faders or crosspoints are yellow or grey.
To avoid accidentally turning every Fade cue from a passive cue into an active cue, Cue Wizard ignores any Fade cues where the output fader is at Off, though this can mean that Fade cues that fade an output out completely may be ignored.
Consequently, once you have run Cue Wizard you should manually check through any Fade cues to ensure nothing unexpected is happening.

Text manipulation
Cue Wizard offers powerful tools as to how it can change the cue number, name and notes of the cues that meet your search criteria.
Cue Lists are commonly assembled using Group Cues to contain all the nitty gritty of the QLab programming. Sometimes you may want Cue Wizard to operate just on the root level of the cue list and to ignore the contents of the groups themselves. The option ‘Include cues within groups’ allows you to either ignore the contents of any groups, or change them. By default it is set to change cues within groups.

It’s easiest to understand how to use these features by considering a few examples.
For example, we may have Searched for all MSC cues in our Search window. In the modifications window, we could choose to change the colour label of them to green. We could use the ‘Change the Cue Name’ | ’Prepend with text’ feature to add ‘LIGHTING CUE: ‘ to the start of the cue name (assuming we were using MIDI Show Control to send MIDI commands from our QLab machine to a lighting desk (or another QLab) that was running the lighting).
For example, we may have lots of un-numbered Text cues that we want to assign numbers to, in their cue name. We would Search for all Text cues, then ‘Change the Cue Name’ | “Prepend with sequential numbers’. When we hit ‘Do it!’ We’re asked what number we want to start with, and by how much to increment with. Choosing 1 for both, our Text cues would then each have the number 1, 2, 3, 4, etc added to the start of their cue name. (Hint: You might want to run Cue Wizard once before this and ‘prepend with text’ to add ‘ ‘ at the start of each cue name)
We can also perform a second search for text, in order to replace it. For example we may initially have Searched for all cues containing the words ’Temporary VO’ in the cue NOTES field. We could now choose to search through the search results from that, and do a Find and Replace on the cue NAME to change ‘VO’ to ‘VO NEEDS REPLACING URGENTLY!’.
Or perhaps we initially searched for all audio cues routing to output 7, now we could Find and Replace in cue name of all cues that route to output 7, swapping ‘VO’ for “VO routed to TV speaker’. Cue Wizard would modify cues that are routed to output 7 and contain ‘VO’ in the cue name, but wouldn’t modify the cue name of other cues. (It would flag or change the colour label of ALL cues that route to output 7, because that is independent of our Find and Replace on the cue name).
Cue Names / dynamic naming
To get the most out of Cue Wizard, it is worth understanding a bit about how QLab generates names for the different cue types and files you drag into a cue list.
When you drag an audio file onto QLab’s cue list, you’ll see the filename of that appear in the cue list as it’s cue name. Often we leave that untouched - but sometimes we edit that filename.
When you make a fade cue, it is initially blank. When you drag an audio file on to it, you’ll see QLab generate a name for it: ‘fade ‘ and then the cue list name of the audio file.
If we drop a sound file called I AM A SOUND FILE.wav on to the cue list, it appears to have the cue name ‘I AM A SOUND FILE.wav’. If we make a fade cue and target our audio file, the Fade cue appears to have the cue name ‘fade I AM A SOUND FILE.wav’. But these cue names are fluid. If I change the name of the sound file in the Mac Finder to ‘I AM A GREAT SOUND FILE.wav’ both the cue name of the audio file, and the fade cue will change accordingly.
The same principle applies for many of the cues within QLab.
There are essentially two types: what I’m calling Source cues, and Control cues.
Source cues are 'Audio', 'Mic', 'Video', 'Camera', 'Text', 'Network', 'MIDI', 'MIDI File', 'Timecode', 'Script', 'Light', 'Wait', and they all create names based on what they target or do.
Control cues, which are 'Fade', 'Start', 'Stop', 'Pause', 'Load', 'Reset', 'Devamp', 'GoTo', 'Target', 'Arm', 'Disarm’, all create names based on the other cue they control.
This dynamic naming is often very useful, particularly for Control cues, so we don’t necessarily want to overwrite it with text, because as soon as you manually edit the dynamic cue name, it becomes frozen and unchanging. If I edit a Fade cue’s name from it’s dynamic ‘fade I AM A SOUND FILE.wav’ to ‘Fade out: I AM A SOUND FILE.wav’, were I then to rename the file to I AM A SOUND FILE.wav (or change the target of the Audio cue to a different sound file altogether), the Fade cue will be locked to saying ‘Fade out: I AM A SOUND FILE.wav’.
If you’ve selected it to rename the Cue Names, Cue Wizard will rename all manually named cues, but it then lets you choose whether to also change the cue name of Source cues and Control cues, independently of each other. Often it makes sense to rename the Source cues and ignore the Control cues, which is the default setting.
If you’ve chosen to Erase all text in the Cue Names, it will erase all manually entered text, and the dynamic names will revert to being visible, if they are normally.
Memo cues follow a slightly different convention, and as we often use them as ‘spacers’ in a cue list, they deserve some special treatment. You’re given the options to change the cue name of Memo cues according to your modification preferences; or to do that, but to ignore any blank memos; or to ignore memo cues altogether. (This all assumes that Memo cues are included within your original search criteria’s results).
Troubleshooting
If you’re having trouble with the cue name, look at the Log file which displays how each cue is named - drag it into Excel or Numbers to see the details more clearly laid out. The cue name field is what you have manually typed in, if any. Cue List Name is what will appear in the cue list (which might be your manual name, an auto-generated name, or be blank) (It’s the name as it appears in the cue list, not the name of the cue list that the cue is in!). Cue Display Name is what is displayed in the standby view (eg Untitled Script Cue) at the top of the main QLab window, or in a Cart. Cue Default Name is what the automatically generated name would be (which might be blank for an untitled script cue).
Cue Wizard uses the Cue List Name field for searches.
Cue numbers
Changing the text of cue numbers can be tricky because QLab rightly prevents you from giving two cues the same cue number. If you try to prepend all your search results’s cues with ’SQ ‘ it’ll name the first cue without an existing number as ‘SQ ‘; then it’ll try to name the next cue without an existing number as ‘SQ ‘ too, which QLab will prevent.
Often we may have cue numbers on our group cues, but the nitty gritty programming within the groups may not have any cue numbers. You have the option to change the text of those cues with blank numbers, or to ignore them (and only change the cues with existing cue numbers).
Cue notes
We don’t have the same problem with cue notes as we do with cue numbers. Cue notes can be anything you like, and you can also paste in pictures and give text rich formatting, which is to say, different fonts, bold, italic, and colours. Due to a limitation with the programming language Cue Wizard is written in (AppleScript), if we modify the text in the Cue Notes at all, we lose all the styling information, and it reverts to plain text. Sometimes, this can be useful: if you copy and paste text into QLab it’s not very visible (as most text is black on a white background, and QLab has a dark background). The ‘Strip Notes rich text formatting’ option in the ‘How would you like to change it?’ Dropdown box lets you remove all text formatting from the Notes field so it goes back to being plain white text.
Again you have the option to change blank cues, or to leave them alone.
Presets
If you find yourself running the same searches and modifications repeatedly, you can click the ‘Save this as a Preset, then run it…’ button, Cue Wizard will ask you where to save the file (which you can then Load on the first Search window next time you run Cue Wizard). After this your preset will run as if you’d clicked ‘Do it!’
Do it!
If you chose to ‘Modify, one by one’, you’ll now get a persistent pop-up window which will walk you through each of your search results, and preview how they will be modified and ask you if you want to ‘Change it’ or ‘Ignore it’. After you’ve chosen, it will move on to the next cue in the search results.
Try pressing Control-F7 on your keyboard (or System Preferences > Keyboard > Shortcuts, then click ‘All controls’ below Full Keyboard Access. This enables you to use Tab, and Shift Tab to move around the Previous and Next buttons more swiftly.
If you chose ‘Modify all’, you’ll see all your cues changing in QLab quite swiftly!
Once complete, either your log file will open up, or a final dialog box will appear to let you know it’s complete.
The Log file will be updated as each cue is modified.
You can always use QLab’s Undo feature to work back through what Cue Wizard has done, but it can do quite a lot so it’s always good to have saved your workspace before running Cue Wizard.
If you have any bug reports, feature requests, or handy Presets to share (I might then build them-in to the program), please let me know at garethfry@hotmail.com